
Automated Logic Thermostat User Manual: A Comprehensive Guide
This comprehensive guide serves as your primary resource for understanding and operating your Automated Logic Thermostat․ It covers everything from basic operations like temperature adjustments and fan speed control to accessing technical documentation and troubleshooting common issues․


Automated Logic thermostats are designed to provide users with intuitive control over their indoor environment‚ seamlessly integrating with the WebCTRL building automation system․ These thermostats‚ particularly the OptiPoint BACnet series‚ feature modern designs‚ large backlit LCD displays‚ and user-friendly interfaces‚ ensuring ease of use for occupants․
This user manual will guide you through the essential aspects of operating Automated Logic thermostats‚ covering a range of topics from basic temperature adjustments to more advanced features․ Whether you’re a building manager seeking to optimize energy efficiency or an occupant looking to personalize your comfort‚ this guide offers valuable insights․
Automated Logic thermostats are engineered for seamless integration with building management systems‚ allowing for centralized control and monitoring of environmental conditions․ The BACnet compatibility ensures interoperability with various systems‚ enabling efficient energy management and optimized comfort levels․
Within this guide‚ you will find clear instructions on how to navigate the thermostat’s interface‚ adjust setpoints‚ and utilize features such as manual override and fan speed control․ We will also provide guidance on accessing online resources‚ including user manuals and technical documentation‚ to further enhance your understanding of your Automated Logic thermostat․
Key Features of Automated Logic BACnet Thermostats
Automated Logic BACnet thermostats are designed with several key features that enhance user experience and optimize building management․ One notable aspect is their seamless integration with the WebCTRL building automation system‚ allowing for centralized control and monitoring․ The BACnet compatibility ensures interoperability with other building systems‚ promoting efficient energy management․
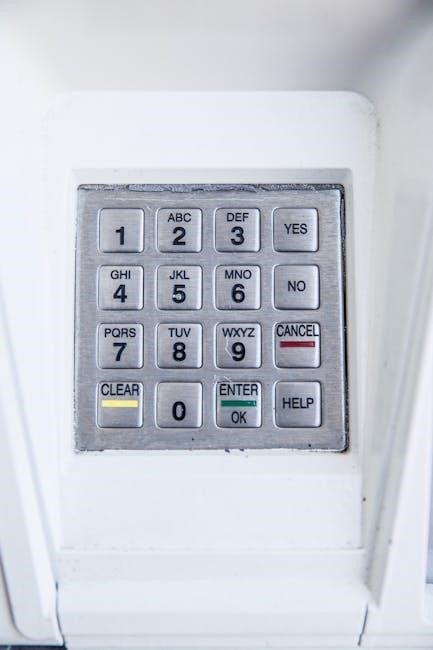
These thermostats boast a modern design‚ featuring large‚ backlit LCD displays that provide clear visibility of temperature settings and other relevant information․ The intuitive interface allows occupants to easily adjust the temperature and fan speed to their desired levels‚ ensuring personalized comfort․ The setpoint adjustment feature allows for precise temperature control using warmer and cooler buttons․
The Manual On function provides temporary override capabilities‚ allowing users to manually activate the heating or cooling system as needed․ Additionally‚ the thermostat displays the current zone temperature‚ providing real-time feedback on the environment․ The ability to switch between Fahrenheit and Celsius allows users to select their preferred temperature scale․
Other key features include on/off control with relay output for cooling or heating applications‚ and a single NTC probe input with a range of -60 to 150 degrees Celsius․ These features combine to create a versatile and user-friendly thermostat solution for modern buildings․
Models: ZS Series Overview (ZS Standard‚ ZS Plus‚ ZS Pro‚ ZS Pro-F)
The Automated Logic ZS Series offers a range of thermostat models designed to meet diverse needs‚ encompassing the ZS Standard‚ ZS Plus‚ ZS Pro‚ and ZS Pro-F․ Each model builds upon the features of the previous one‚ providing increasing levels of functionality and control․ The ZS Standard serves as the base model‚ offering essential temperature control and fan speed settings․
The ZS Plus enhances the standard model with additional features such as advanced scheduling capabilities and energy-saving modes‚ allowing for more granular control over the environment․ The ZS Pro takes it a step further by incorporating BACnet communication‚ enabling seamless integration with building automation systems and remote monitoring capabilities․
The ZS Pro-F‚ the flagship model in the series‚ includes all the features of the ZS Pro‚ along with a flush-mount design for a sleek and modern aesthetic․ All ZS Series models share a user-friendly interface with intuitive controls and clear display‚ ensuring ease of operation for occupants․
Regardless of the specific model‚ the ZS Series thermostats are engineered for reliability and accuracy‚ providing precise temperature control and contributing to overall energy efficiency․ This range allows customers to select the model that best aligns with their specific requirements and budget․
Accessing User Manuals and Technical Documentation Online

To access comprehensive user manuals and technical documentation for your Automated Logic thermostat‚ a streamlined online portal is available․ Begin by navigating to the Automated Logic website using your preferred web browser․ Once on the homepage‚ locate the “Support” section‚ typically found in the navigation menu or footer․
Within the support section‚ you will find a dedicated area for accessing downloadable documents; This area is often labeled as “Downloads‚” “Documentation‚” or “Resource Library․” Click on this link to proceed to the document repository․ Here‚ you can filter and search for specific user manuals‚ technical instructions‚ hardware documentation‚ and other relevant materials related to your specific Automated Logic thermostat model․
Utilize the search filters to narrow down the results based on the model number‚ document type‚ or keywords․ Once you have located the desired document‚ simply click on the download link to save the file to your computer․ The documents are typically available in PDF format‚ ensuring compatibility across various devices․
Regularly checking the online support portal ensures you have access to the latest versions of user manuals and technical documentation‚ keeping you informed about updates‚ features‚ and troubleshooting procedures․
Downloading Documents from Automated Logic Support Website
Downloading essential documents from the Automated Logic support website is a straightforward process․ First‚ ensure you have a stable internet connection and a compatible web browser․ Navigate to the Automated Logic website and locate the “Support” section‚ often found in the header or footer menu․

Within the “Support” section‚ find and click on the “Downloads” or “Documents” link․ This will take you to a page where various resources are available․ You can then filter by document type‚ product series‚ or keywords to find the specific manual or technical instruction you need․
Once you’ve located the desired document‚ click on its title or a download icon next to it․ This will initiate the download process․ The document will typically be in PDF format‚ requiring a PDF reader like Adobe Acrobat Reader to open and view․
Before downloading‚ ensure the document version is the latest to get the most up-to-date information․ After downloading‚ save the document in a convenient location on your computer for easy access․ Regularly check the support website for updated documents to stay informed about new features or changes․
OptiPoint BACnet Thermostats: Design and Functionality
Automated Logic’s OptiPoint BACnet thermostats are engineered with a focus on both aesthetic appeal and user-friendly functionality․ These thermostats boast a modern design that seamlessly integrates into various interior settings․ The large‚ backlit LCD displays ensure clear visibility of temperature settings and other relevant information‚ even in dimly lit environments․
The intuitive interface simplifies operation‚ making it easy for occupants to adjust temperature and fan speed settings to their preferences․ Functionally‚ OptiPoint BACnet thermostats are designed for seamless integration with the WebCTRL building automation system‚ enabling centralized control and monitoring of climate control parameters․
BACnet communication protocol ensures interoperability with other building automation devices‚ facilitating efficient energy management and optimized comfort levels․ The thermostats also support various control strategies‚ including heating‚ cooling‚ and ventilation‚ adapting to diverse environmental conditions and occupant needs․
Furthermore‚ the OptiPoint series often includes advanced features such as occupancy sensing and programmable schedules‚ further enhancing energy efficiency and user convenience․ The robust design and reliable performance of OptiPoint thermostats make them a valuable asset in modern building automation systems․
Basic Operation: Setting Temperature and Fan Speed
Operating your Automated Logic Thermostat involves a few simple steps to adjust the temperature and fan speed according to your comfort preferences; The primary interface typically features buttons or a touchscreen for these adjustments․ To set the desired temperature‚ locate the “Warmer” and “Cooler” buttons‚ often indicated by up and down arrows or “+” and “-” symbols․ Press the “Warmer” button to increase the setpoint temperature or the “Cooler” button to decrease it․
The current setpoint temperature will be displayed on the LCD screen․ For fan speed control‚ there’s usually a dedicated button labeled “Fan” or depicted with a fan icon․ Pressing this button will cycle through available fan speed options‚ such as “Low‚” “Medium‚” “High‚” and “Auto․” In “Auto” mode‚ the thermostat automatically adjusts the fan speed based on the heating or cooling demand․
The selected fan speed will also be indicated on the display․ Some models may offer additional fan modes like “Continuous‚” where the fan runs constantly‚ or “Cycle‚” where the fan operates intermittently․ Understanding these basic operations allows you to easily maintain a comfortable environment within your space․
Setpoint Adjustment: Warmer and Cooler Buttons
The primary method for adjusting the desired temperature on your Automated Logic thermostat involves utilizing the “Warmer” and “Cooler” buttons․ These buttons‚ typically marked with up and down arrows or “+” and “-” symbols‚ offer a simple and intuitive way to modify the setpoint to achieve optimal comfort․

Pressing the “Warmer” button will increase the setpoint temperature‚ signaling the system to initiate heating if the current room temperature is below the new setpoint․ Conversely‚ pressing the “Cooler” button will decrease the setpoint temperature‚ prompting the system to activate cooling if the room temperature is above the adjusted setpoint․ Each press of either button typically adjusts the temperature by one degree Fahrenheit or Celsius‚ depending on your unit’s configuration․
After making an adjustment‚ the new setpoint temperature will be displayed on the thermostat’s LCD screen․ It’s important to note that the system’s response time may vary‚ and it might take a few minutes for the room temperature to align with the newly selected setpoint․ These buttons provide a user-friendly interface for fine-tuning your environment․
Manual On Function and Zone Temperature Display
The Manual On function on your Automated Logic thermostat provides a direct way to activate the system‚ overriding any pre-set schedules or automated controls temporarily․ This feature is particularly useful when you need immediate heating or cooling‚ regardless of the current settings․ Activating the Manual On function typically involves pressing a dedicated button labeled “Manual On” or a similar designation․
Upon pressing the Manual On button‚ the thermostat will engage the heating or cooling system based on the current setpoint temperature and the room’s ambient temperature․ It’s important to note that after activating Manual On‚ you may need to wait a few seconds for the system to fully engage and the effects to become noticeable․ The thermostat’s display also shows current zone temperature․

The zone temperature display shows the real-time temperature of the area being controlled by the thermostat․ This information is crucial for monitoring the effectiveness of the heating or cooling system and making informed adjustments to the setpoint․ The zone temperature is displayed prominently on the LCD screen‚ allowing users to easily track the current conditions․

Switching Between Fahrenheit and Celsius
Automated Logic thermostats offer the convenience of displaying temperature readings in either Fahrenheit (°F) or Celsius (°C)‚ catering to user preferences and regional standards․ The process for switching between these temperature scales is typically straightforward‚ ensuring ease of use for all occupants․
To toggle between Fahrenheit and Celsius‚ locate the designated button or menu option on your thermostat․ This button is often labeled “F/C” or may be found within the settings menu․ Pressing this button will instantly change the temperature display from one scale to the other․ Some models may require you to hold the button down for a few seconds to confirm the change․
The selected temperature scale will be applied to all temperature readings displayed on the thermostat‚ including the current zone temperature and the setpoint temperature․ This ensures consistency and prevents confusion when monitoring and adjusting the climate control system․ The chosen setting will usually persist even after a power cycle‚ so you only need to set your preferred scale once․ Should you need to change it again‚ simply repeat the steps outlined above․
Power Supply Considerations
Ensuring a stable and adequate power supply is crucial for the reliable operation of your Automated Logic thermostat․ These thermostats are typically powered by a controller‚ which provides a limited amount of power․ It’s essential to adhere to the controller’s specifications to prevent any performance issues or potential damage to the thermostat․
Before installation‚ carefully review the power requirements outlined in the thermostat’s technical documentation and the controller’s specifications․ If the power demand of the thermostat exceeds the controller’s capacity‚ an auxiliary power source may be necessary․ Failure to provide sufficient power can lead to erratic behavior‚ display problems‚ or complete thermostat malfunction․
When connecting the thermostat to the power source‚ ensure proper wiring and polarity․ Incorrect wiring can cause short circuits or irreversible damage to the device․ It is recommended to use a qualified technician for installation and any electrical work to guarantee safety and optimal performance․ Regularly inspect the wiring connections for any signs of wear or damage‚ and promptly address any issues to maintain a consistent and reliable power supply to your Automated Logic thermostat․ Remember to consult the controller specifications for precise power limitations․
Troubleshooting Common Issues
Encountering issues with your Automated Logic thermostat can be frustrating‚ but many common problems can be resolved with simple troubleshooting steps․ Before seeking professional assistance‚ consider these potential solutions․ If the display is blank or unresponsive‚ verify that the thermostat is receiving power․ Check the wiring connections and ensure they are secure and properly connected to the controller․
If the thermostat is displaying an incorrect temperature‚ ensure that the sensor is clean and free from obstructions․ Also‚ confirm that the thermostat is configured to display the correct temperature scale (Fahrenheit or Celsius)․ Inconsistent temperature control can often be attributed to incorrect setpoint adjustments․ Double-check your desired temperature settings and ensure they align with your comfort preferences․
For issues related to fan operation‚ verify that the fan speed settings are correctly configured․ If the fan is not responding to manual adjustments‚ it may indicate a problem with the wiring or the fan motor itself․ If the problem persists‚ consult the technical documentation or contact a qualified technician for further assistance․ Remember to document any error messages or unusual behavior to aid in the troubleshooting process․
Resetting Your Automated Logic Thermostat
Resetting your Automated Logic thermostat can often resolve minor software glitches or configuration issues․ Before initiating a reset‚ it’s crucial to understand the different types of resets available and their potential consequences․ A soft reset typically involves cycling the power to the thermostat‚ which can be achieved by disconnecting and reconnecting the power supply․ This method is generally safe and will not erase any saved settings․
A hard reset‚ on the other hand‚ will restore the thermostat to its factory default settings; This process will erase all user-defined configurations‚ including temperature preferences‚ schedules‚ and network settings․ Therefore‚ it’s essential to back up any critical data before performing a hard reset․ The specific procedure for initiating a hard reset may vary depending on the thermostat model․
Consult the user manual for detailed instructions on how to perform a hard reset safely and effectively․ In some cases‚ a combination of button presses or a specific sequence of actions may be required․ After completing the reset‚ you will need to reconfigure the thermostat to your desired settings‚ including temperature setpoints‚ fan speeds‚ and network connectivity․ If you encounter any difficulties during the reset process‚ refer to the troubleshooting section of the user manual or contact Automated Logic support for assistance․